
Q software basics
Q Software Basics for Your Q Series Keyboard (4Q, X50Q, 5Q, 5QS)
For this article, keys and key combinations will be represented by bold italics.
Das Keyboard's Q Software is a specialized, cloud-based software companion to our Q Series keyboards. Its purpose is to bring maximum customization and productivity to your smart keyboard. Its functions can be split into two categories: Customization and Applets.
Customization Basics:
You can use our Q Software to customize your smart keyboard's colors and key animations.
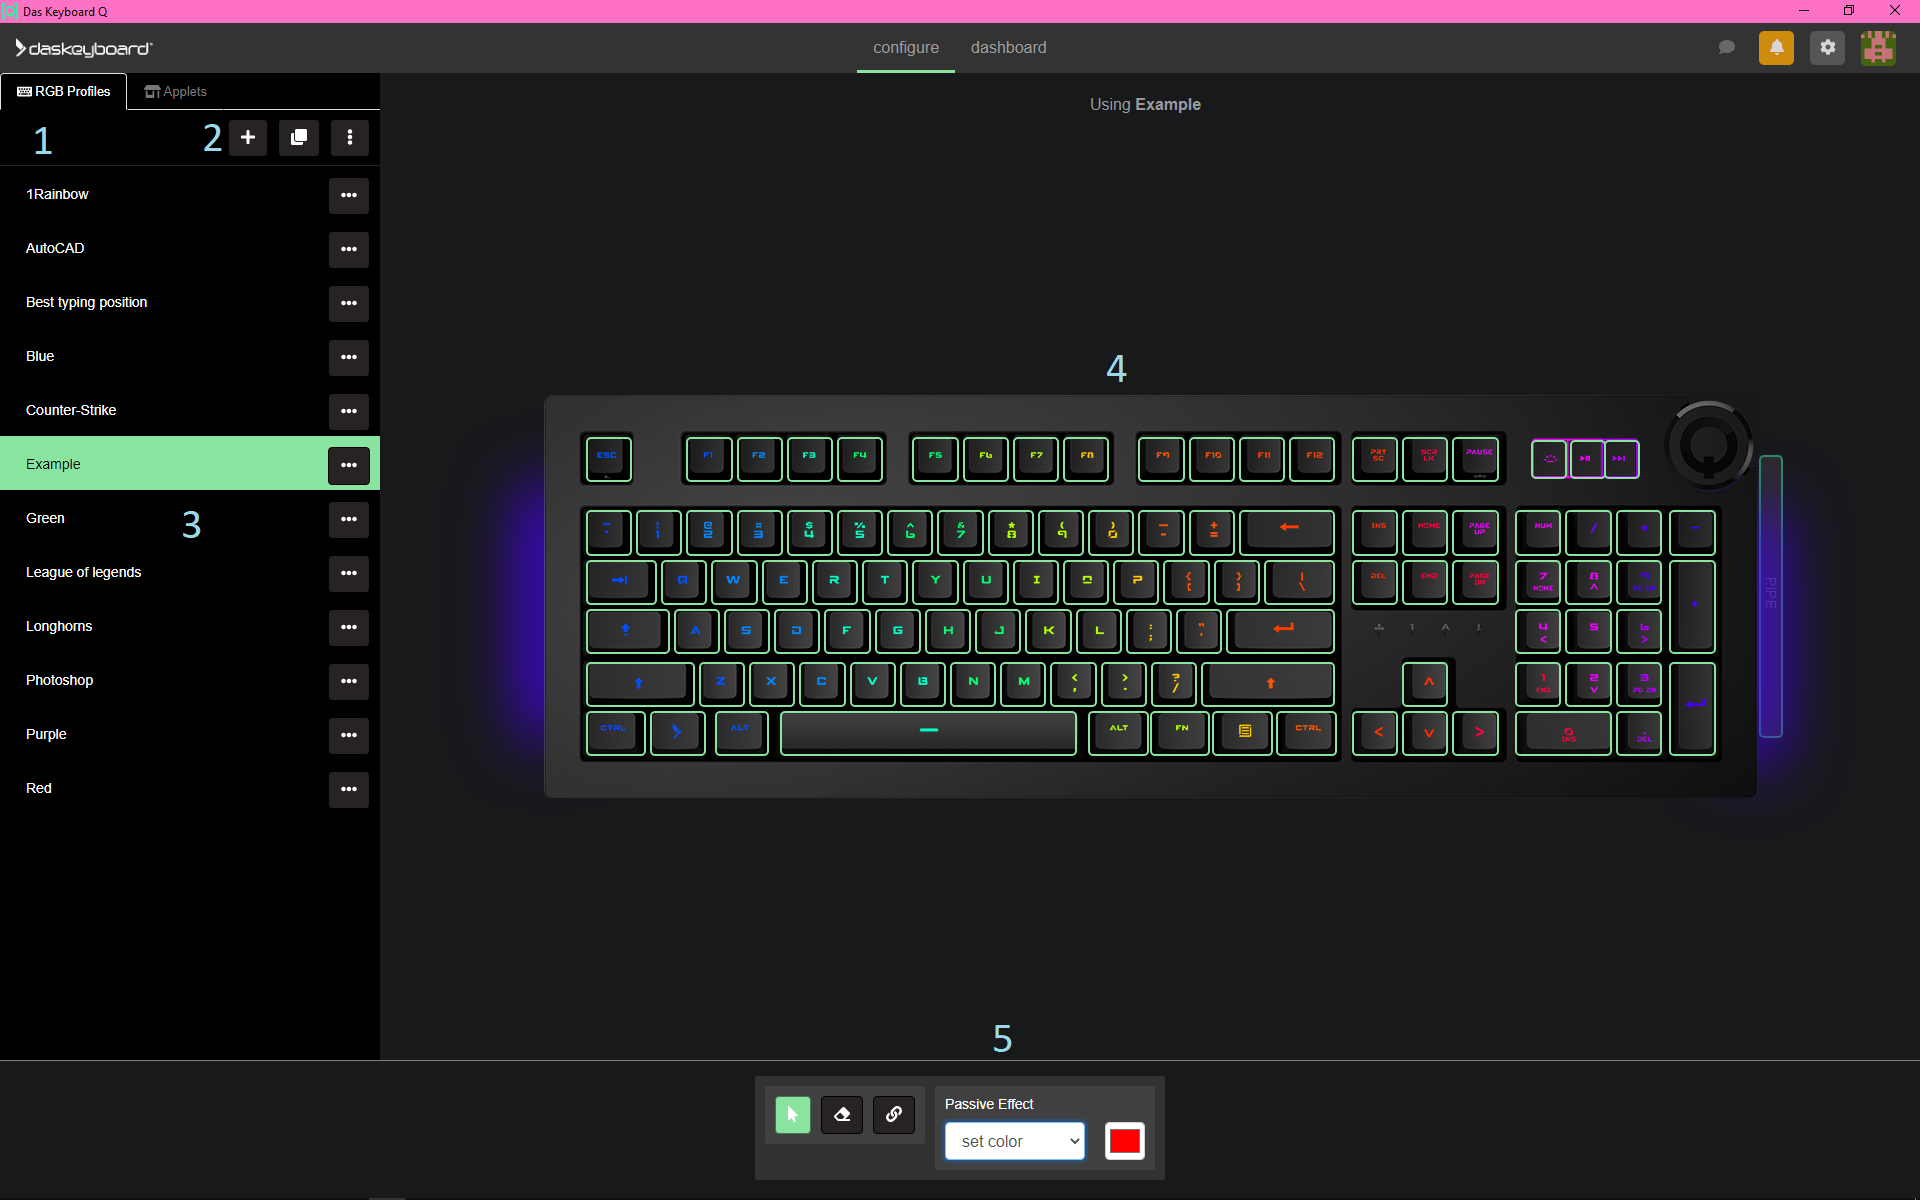
Upon selecting the RGB Profiles tab (1), you will see multiple customization presets for your keyboard. You can also create a custom preset by clicking the plus symbol at the bottom right of the tab (2).
You can access and switch between all of your profiles/presets by clicking them in the profile selection window (3).
When a profile is selected, it will show in the middle of the Q Software on a diagram of your keyboard (4). This is also where any aesthetic customization of the board takes place.
To edit your keys, you can click them in the diagram (single keys), CTRL-click them (multiple individual keys), or drag your mouse across them (clusters of keys). Once selected, you can customize your keys in different ways using the bar at the bottom of the screen (5).
Play around with different settings in the customization menu, passive effects and active effects to see what you enjoy. You can even set a profile to activate when certain programs open.
Applet Basics:
The other function of our Q Software is the Applets center, which provides the "smart" functionality of your board.
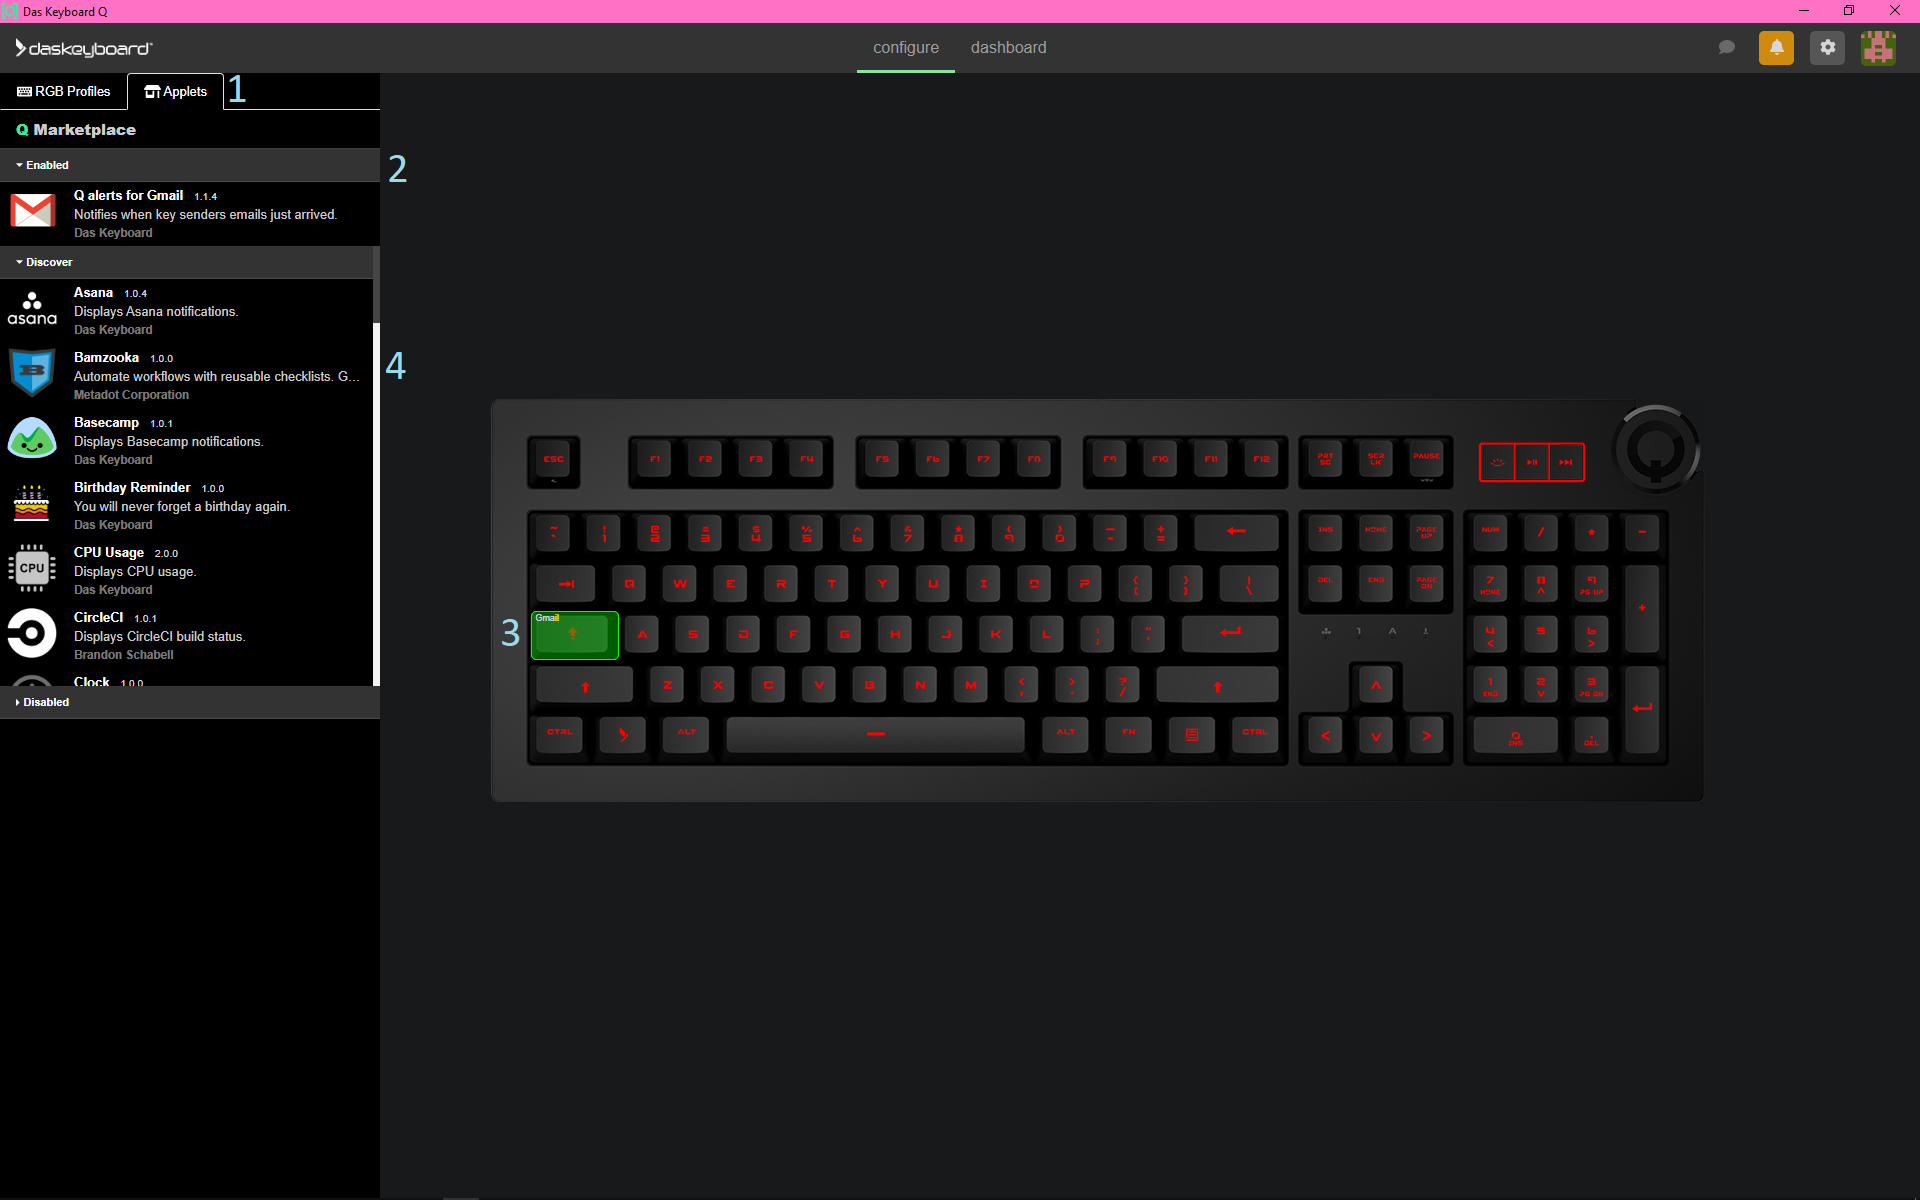
You can access and edit your applets by clicking the APPLETS tab in your configure menu (1).
This screen will show you applets that you have installed, applets that you can discover, applets that you have disabled, and where your applets are placed on your board.
For example, in this screenshot I have the Gmail alerts applet installed (2). This applet tells me when I have an email from certain addresses by flashing the key that I have chosen for the applet (3).
You can discover and install applets by using the Discover menu (4). Each applet has a different function, and when you click through them, they describe themselves and their function so that you can tell whether they are a fit for you. If you wish to install an applet, the Q Software will walk you through the simple install process.
In the screenshot below, you can see the DASHBOARD screen. This shows all of your applets and any notifications they may have for you. This screen can be accessed by pressing the Q button on your keyboard or by clicking DASHBOARD at the top of the Q Software.
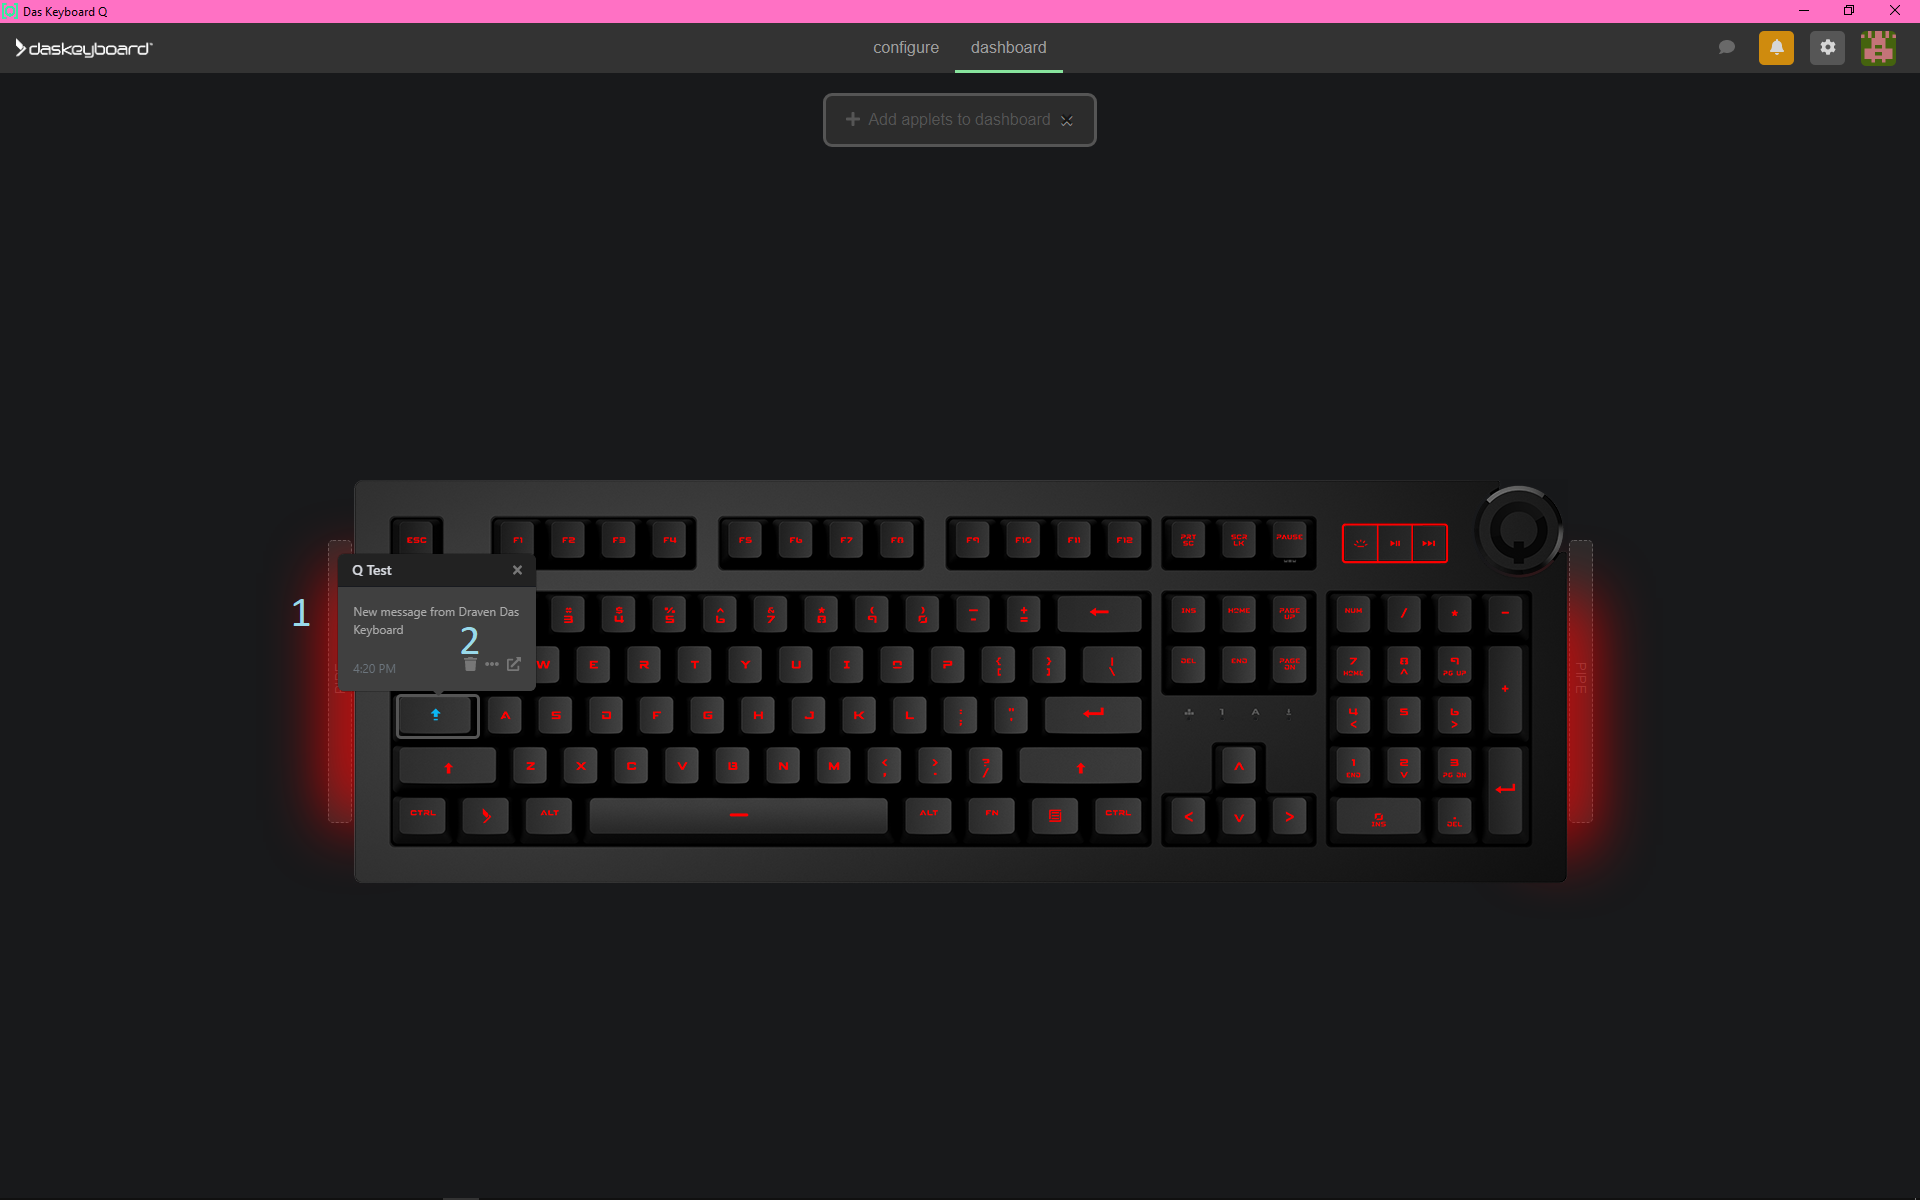
In the screenshot, you can see an example notification from the Gmail applet (1). The applet is telling me that I have a message from a specific address. Now that I know, I can press the trash button to dismiss the notification until I receive my next message (2).
For advanced Q Software information, please reach out to our helpdesk.
Give feedback